Make your own rear drawer system

If you have been touring in your 4wd for long enough you will eventually come to the realisation that a set of drawers in the rear cargo area is an invaluable way to organise all your equipment, spares and camping gear. The problem is they are often expensive and you can be limited in the configurations available. This was a problem I faced with our Patrol and so I thought I would have a go at building a set for myself. It actually wasn’t all that difficult. The drawers were not perfect but they did the job necessary and, I reckon the final result looked somewhat professional. I made a few mistakes along the way and I will point those out where I can but for the most part, they worked and did the job I needed them to do. Here’s how I did it.
First thing you need to do is to decide what material you want to make the system with. I had a heap of MDF lying around and in truth this was not the ideal material for the job. Its heavy and it is prone to cracking and moisture ingress. But it is easy to work with and the end product survived some pretty rough conditions. I think if I ever did the same thing again, I reckon marine ply would be more suitable.

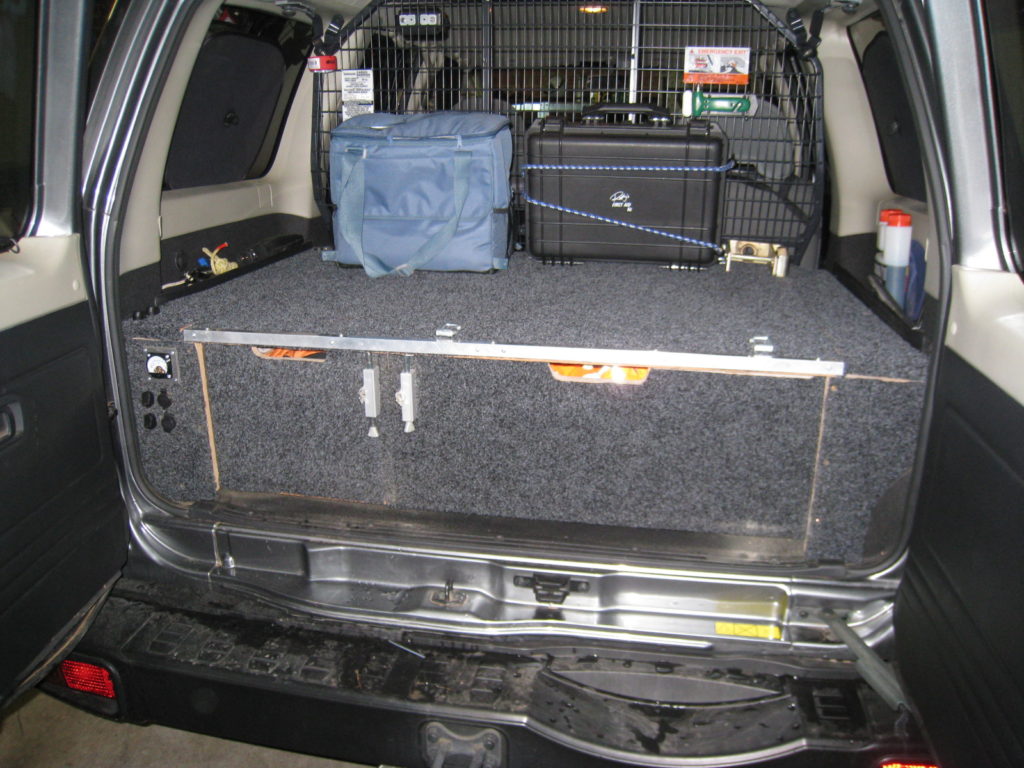
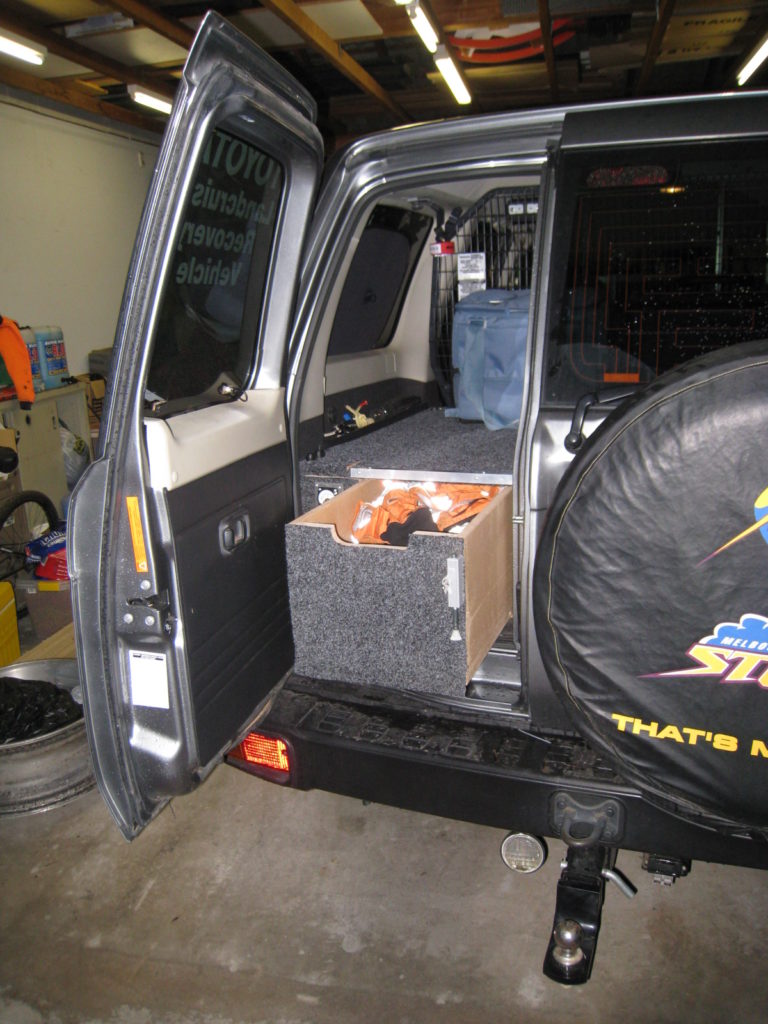
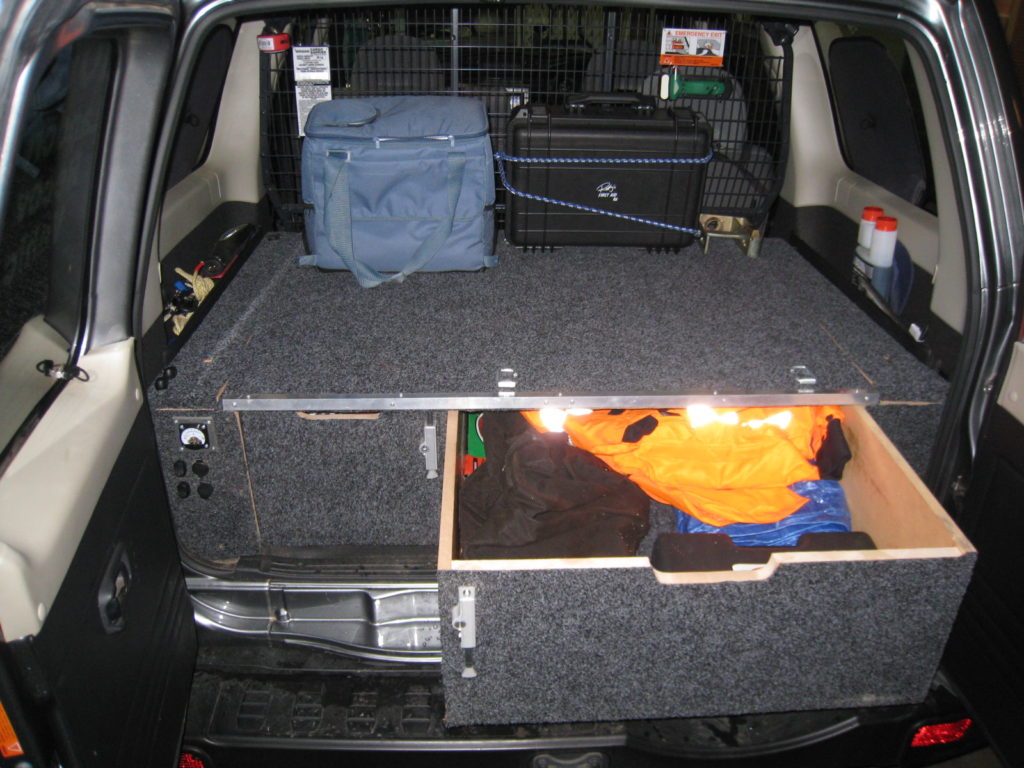
The next thing you need to do is to come up with a configuration that suits your needs. Most double drawers are side by side and this is a good design as it still gives you a large flat area to store other gear. The problem with the commercial systems was that the drawers are the same size. This may not be a huge issue for most vehicles, but in the case of the Patrol with its barn doors of unequal width, I thought this might be a restriction. So I designed the drawers to be different widths, allowing access to the smaller drawer when just the left had door was opened. I stored all my recovery gear in here which meant I had quick access to this equipment when I needed it.
Now you will need to decide how to secure the system to the rear cargo area. Most larger 4wds have mounting brackets for the third row seating. This is a ready made area to bolt your drawer system to. In the Patrol, there were 4 convenient holes that I could utilise for this purpose. If you don’t have these, you may find bold holes in the floor that can be used. Failing that, you may need to drill holes into the floor and bloth the drawers through them.

With a suitable mounting system identified, I then made a template of the floor area out of cardboard. This was my template for the false floor to which the drawers would be mounted. For various reasons, I needed the false floor to sit about 1cm off the actual floor. This meant I needed to fashion brackets out of some scrap square steel tubing.
With the false floor cut I then added the three side walls by screwing them from the bottom of the base. You have to do this before installing the base.
Next I made and fitted the top board being careful to ensure I screwed the base to the walls. I now had the shell of the system ready to go.

Next I made the drawers themselves. I didn’t want to have to muck around with drawer runners so I simply made the drawers just wide enough so they fitted into the cavities. To make them slide easily, I had made the base out of laminated MDF and, on the bottom of the drawers, I glued a couple of strips of carpet. This system actually worked pretty well. For handles, I just cut out a small section from the top of the facia of sufficient size to allow my hand to reach in and grab the drawer. I used heavy duty window locks to secure the drawers shut. Very simple…!

Once the drawers were made, I covered everything with marine carpet. I few squirts of liquid nails was enough to secure the carpet to the board. I also installed a couple of strong tie-down points on the top of the drawer system.

The last thing I did was to make the wings for the outer edges. These allowed access to the side pockets where I mounted electrical outlets and an air pump. If you’re going to install power outlets, make sure you recess the facia panels so the doors do not squash the leads when they are shut. I also installed a couple of additional power outlets in the rear of the drawers for powering a fridge.
That’s about all there is to it. Simple and easy to make and as long as you choose the right material, it should last for the lifetime of the vehicle.


