Have you ever seen those cool photos of lightning and wondered how the photographer got that shot? Surely they must have used an expensive digital SLR camera as well as some trick photo editing software. The truth is many of the most spectacular lightning photos are captured by some very clever photographers who know a lot about correct lighting, exposure control and, it has to be said, being in the right place at the right time. But what if I told you that you can capture your own photos of lightning with nothing more than your smart-phone? Not possible? I can tell you it is possible and the results can be quite spectacular.
DISCLAIMER: IMPORTANT HEALTH AND SAFETY WARNING. Trying to photograph lightning is inherently dangerous. Lightning is only present in severe thunderstorms and many people have been killed or seriously injured by these storms. Purposely putting yourself out in the open to photograph these storms can result in serious injury or death. You have been warned.
I say this knowing something about this risk. I am a bit of a storm freak and have been known to travel into a storm area on purpose to try to capture some spectacular images. I have been nearly struck by lightning twice in the process.
Ok....now that's out of the way, let's go into the process itself. There's actually 2 ways to do this and both are very easy.
The first is to download an app called LightningCam2. It works by scanning the scene in the camera's view and taking photos reactively. You really need to have the smart-phone sitting in a tripod of some description to yield the best results. I have this app but have never used it but a mate of mine does use it and he has captured some amazing images. By all means, download this program and give it a go for yourself.
The second method is as simple as taking a movie of the area you see lightning striking. Obviously it is impossible to tell where lightning will strike but if you observe the storm for a length of time, you will be able to predict with reasonable accuracy where the next strike is likely to occur. Slow moving storms are best for this.
Now I like to take movies of the potential area in blocks of 10 – 20 seconds at a time. The reasons for this will be obvious as we go through the process. When you have captured some video snippets where you believe you have captured some strikes, its time to find the individual frames with the strikes in those snippets.
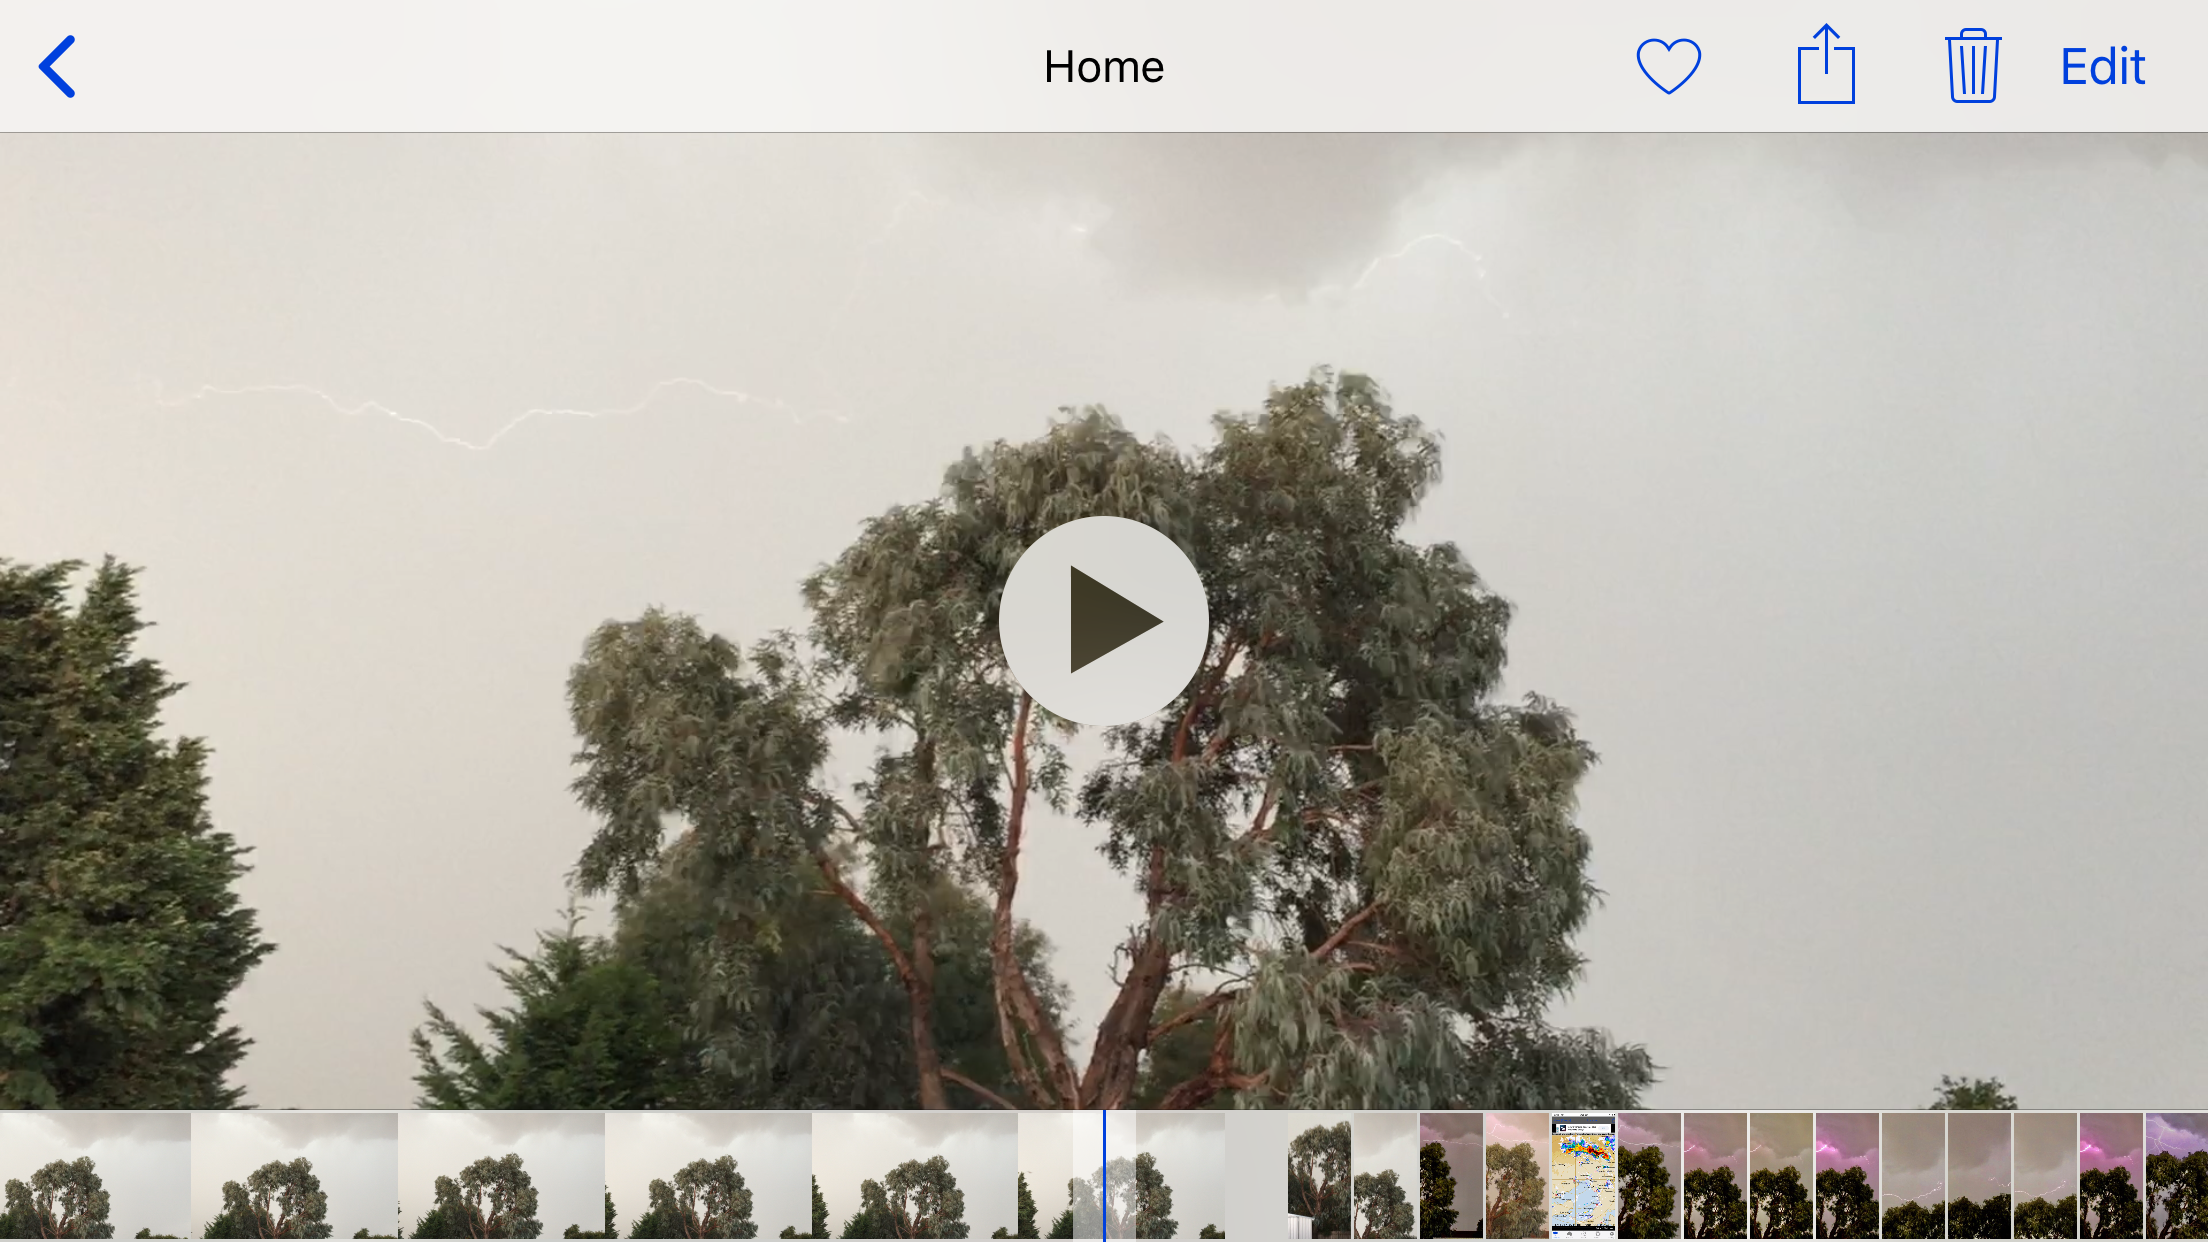
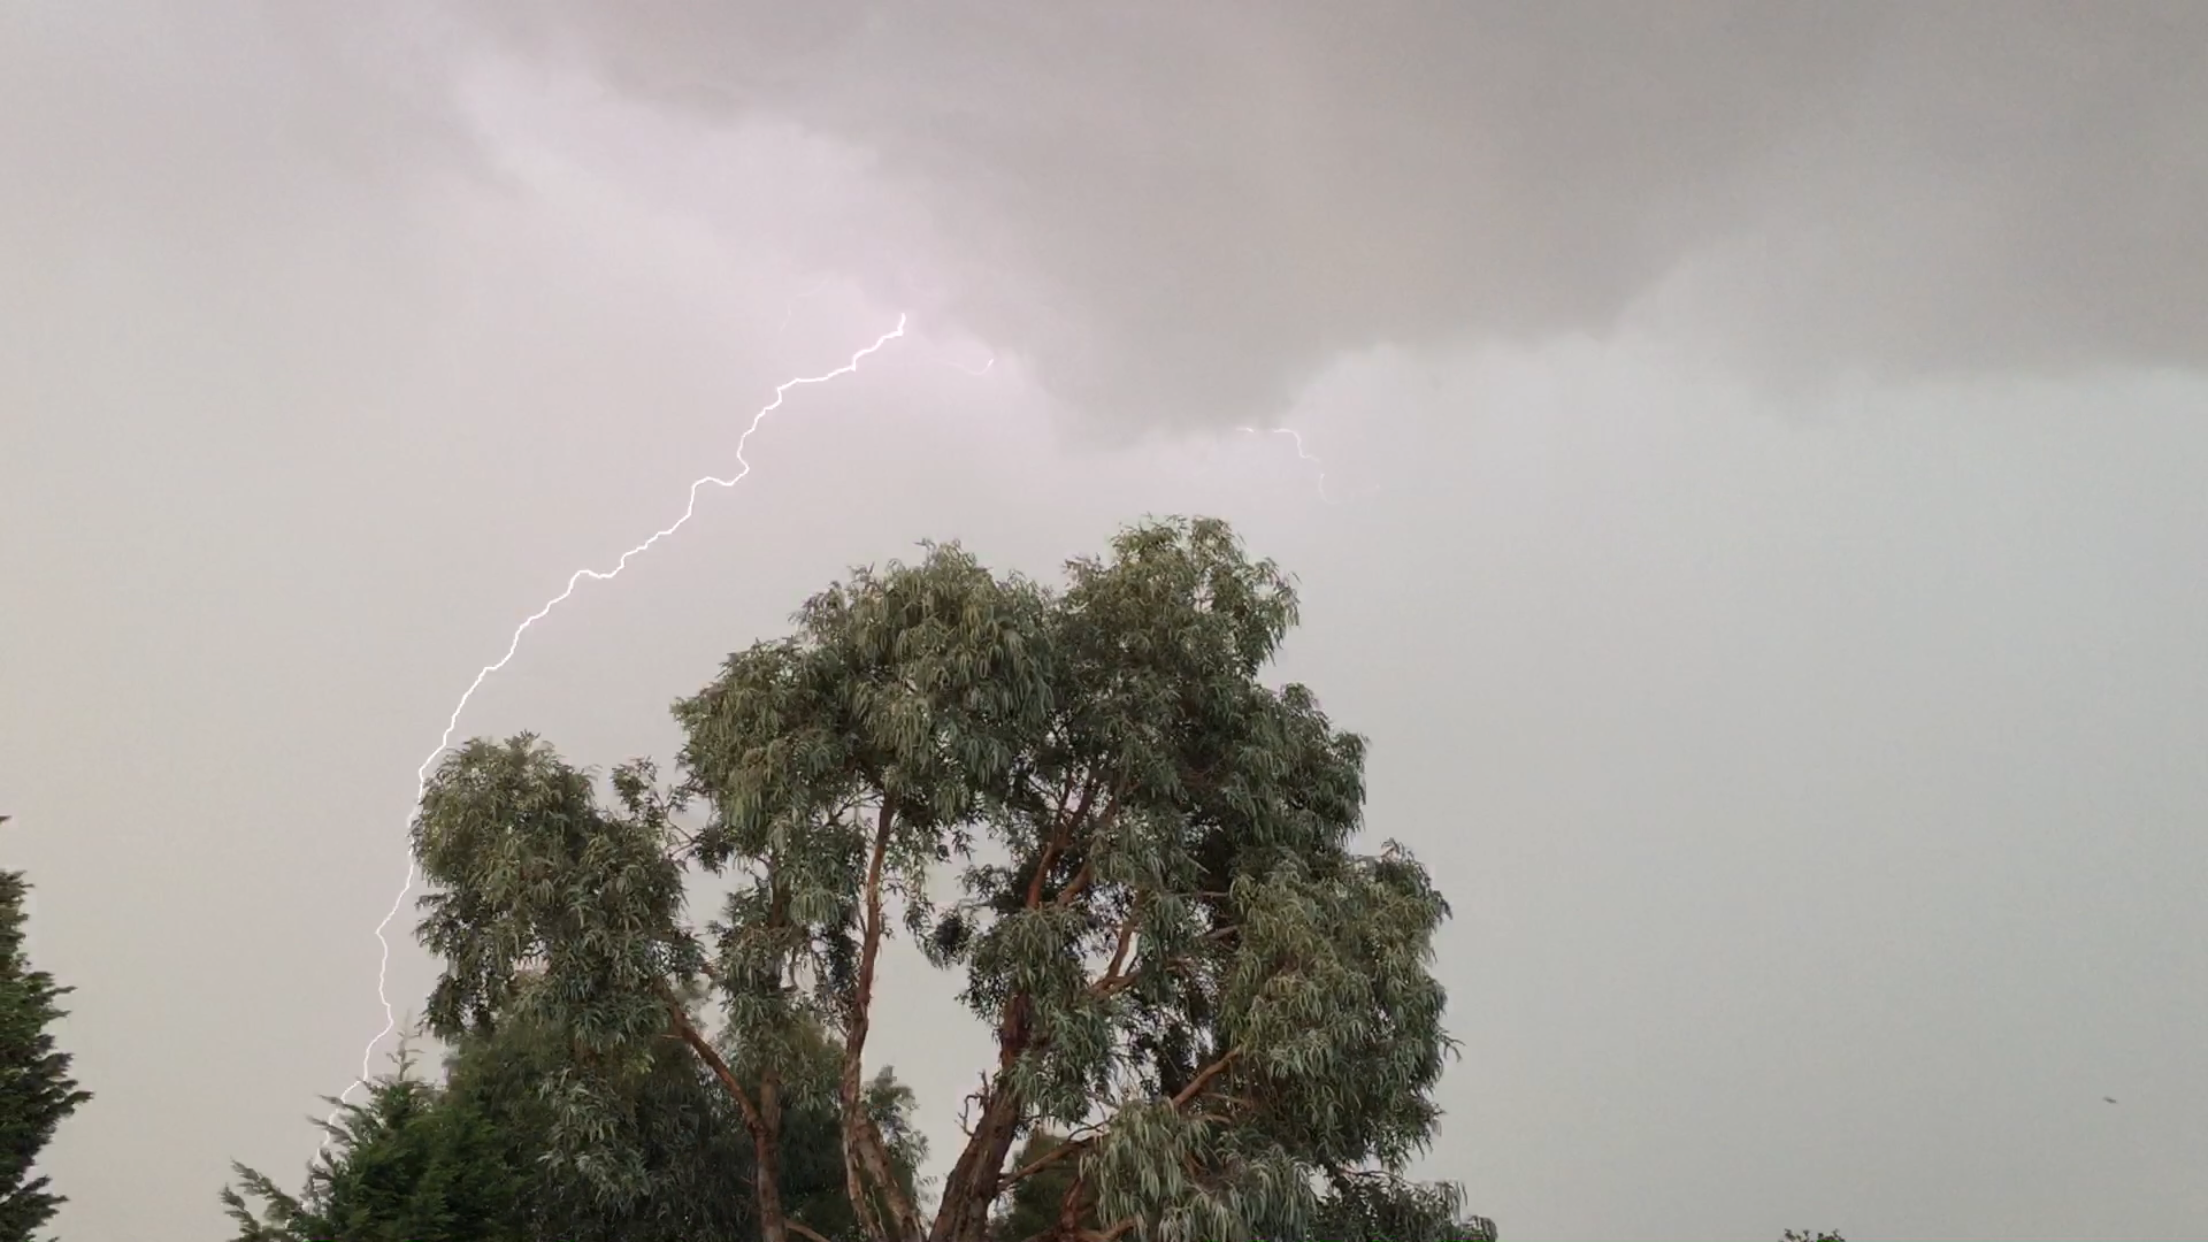
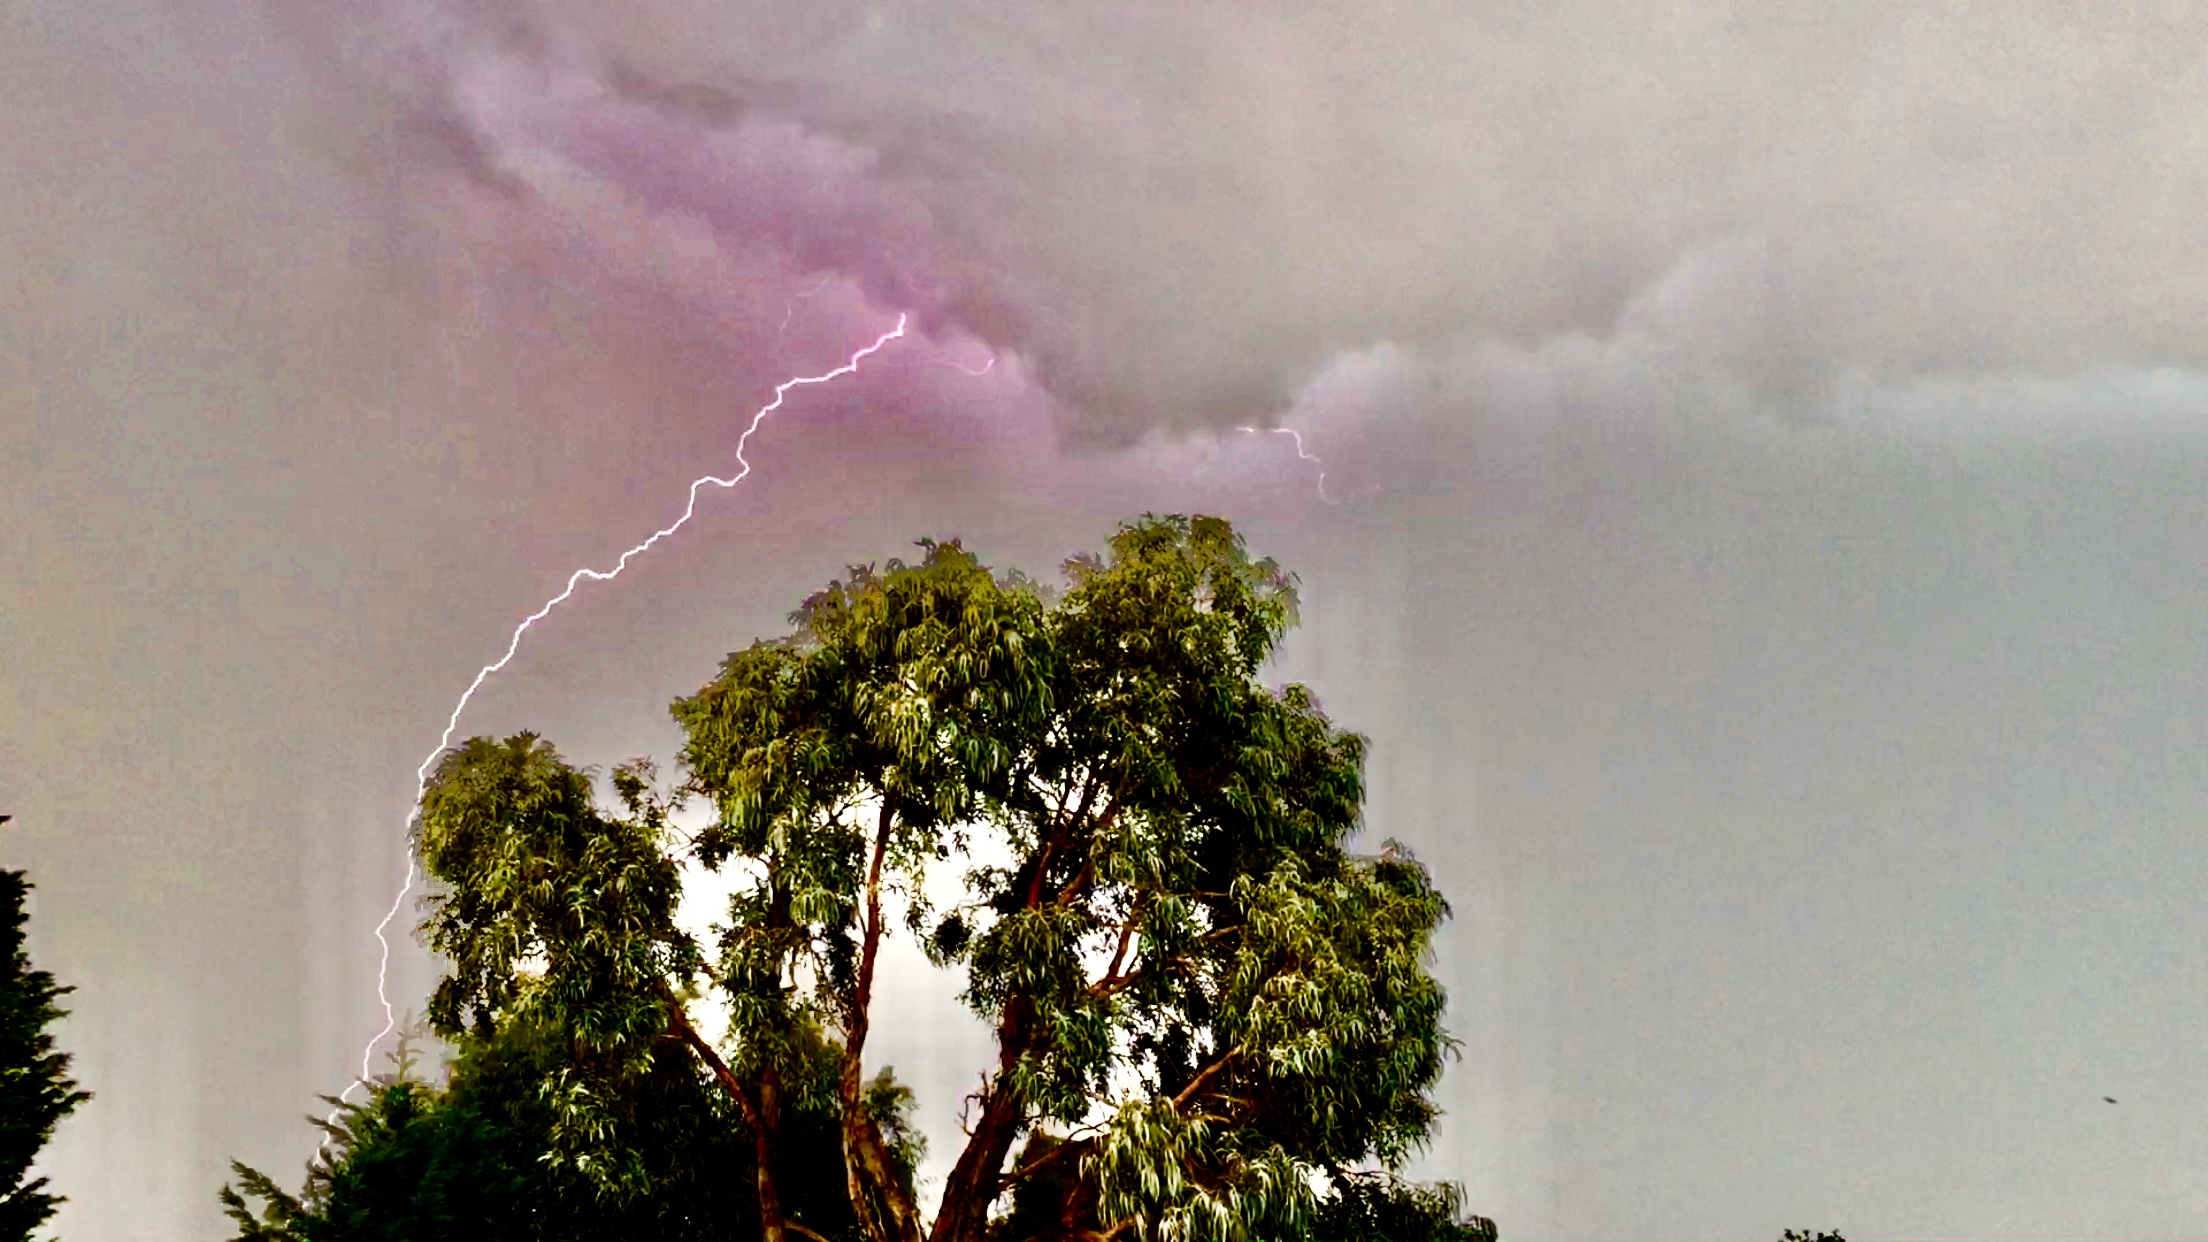
Play one of the movies and pause it immediately. Then use the scrubbing tool at the bottom of the video to manually scroll through the frames and find the spot where the lightning strike was captured. You'll know it by the sudden brightening of a few frames. Now this is where the fiddly bit comes in. You have to scrub to the actual frame or frames that the strike was captured. Its tricky but with care its easy to do. When you find the frame, simply take a screen shot of it. Should look something like this if you're using an iPhone:
It may not look like much now but trust me, all the detail is hidden in the image. All you need to do now is to bring out that detail and, again, your smart phone has the software to do it.
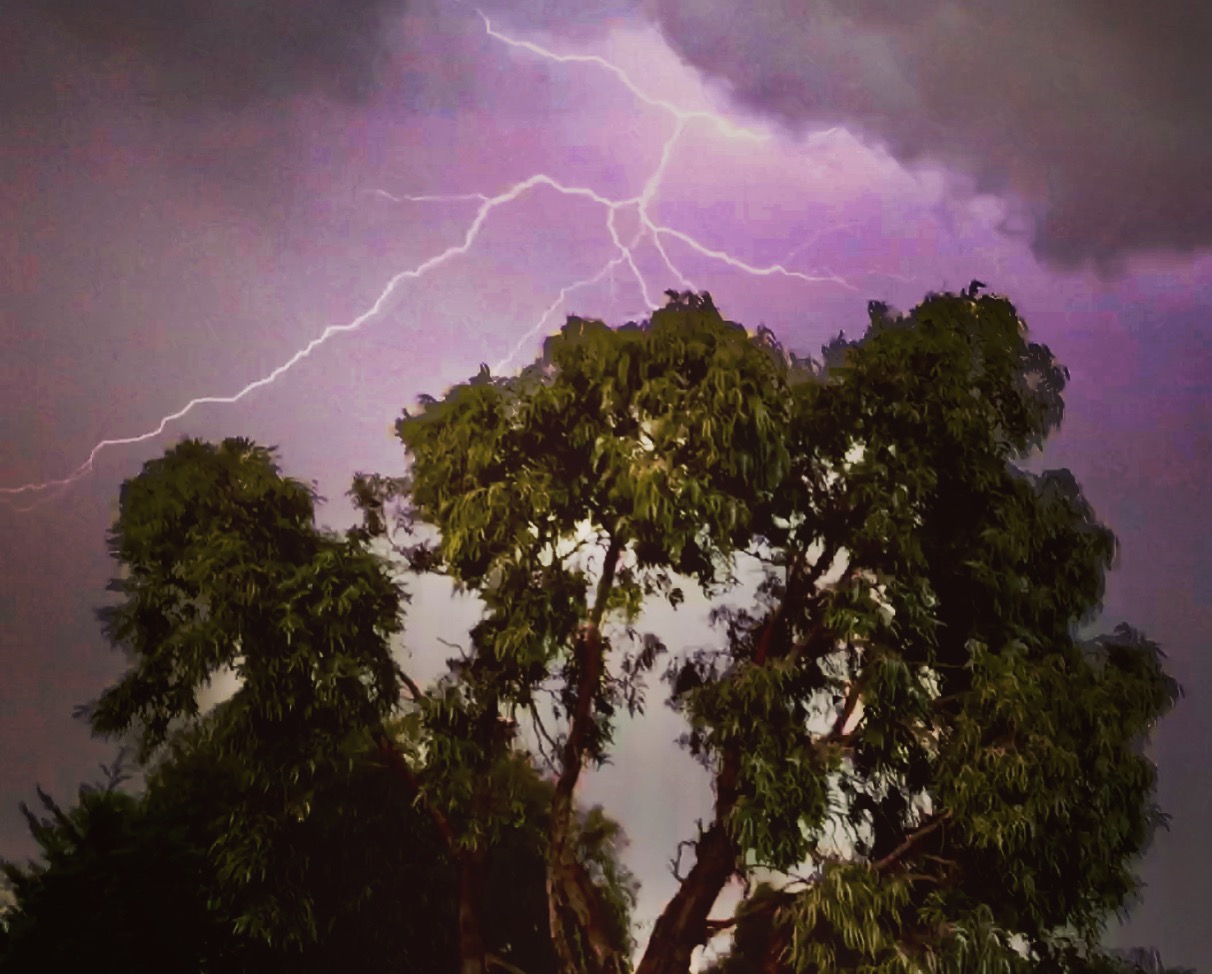
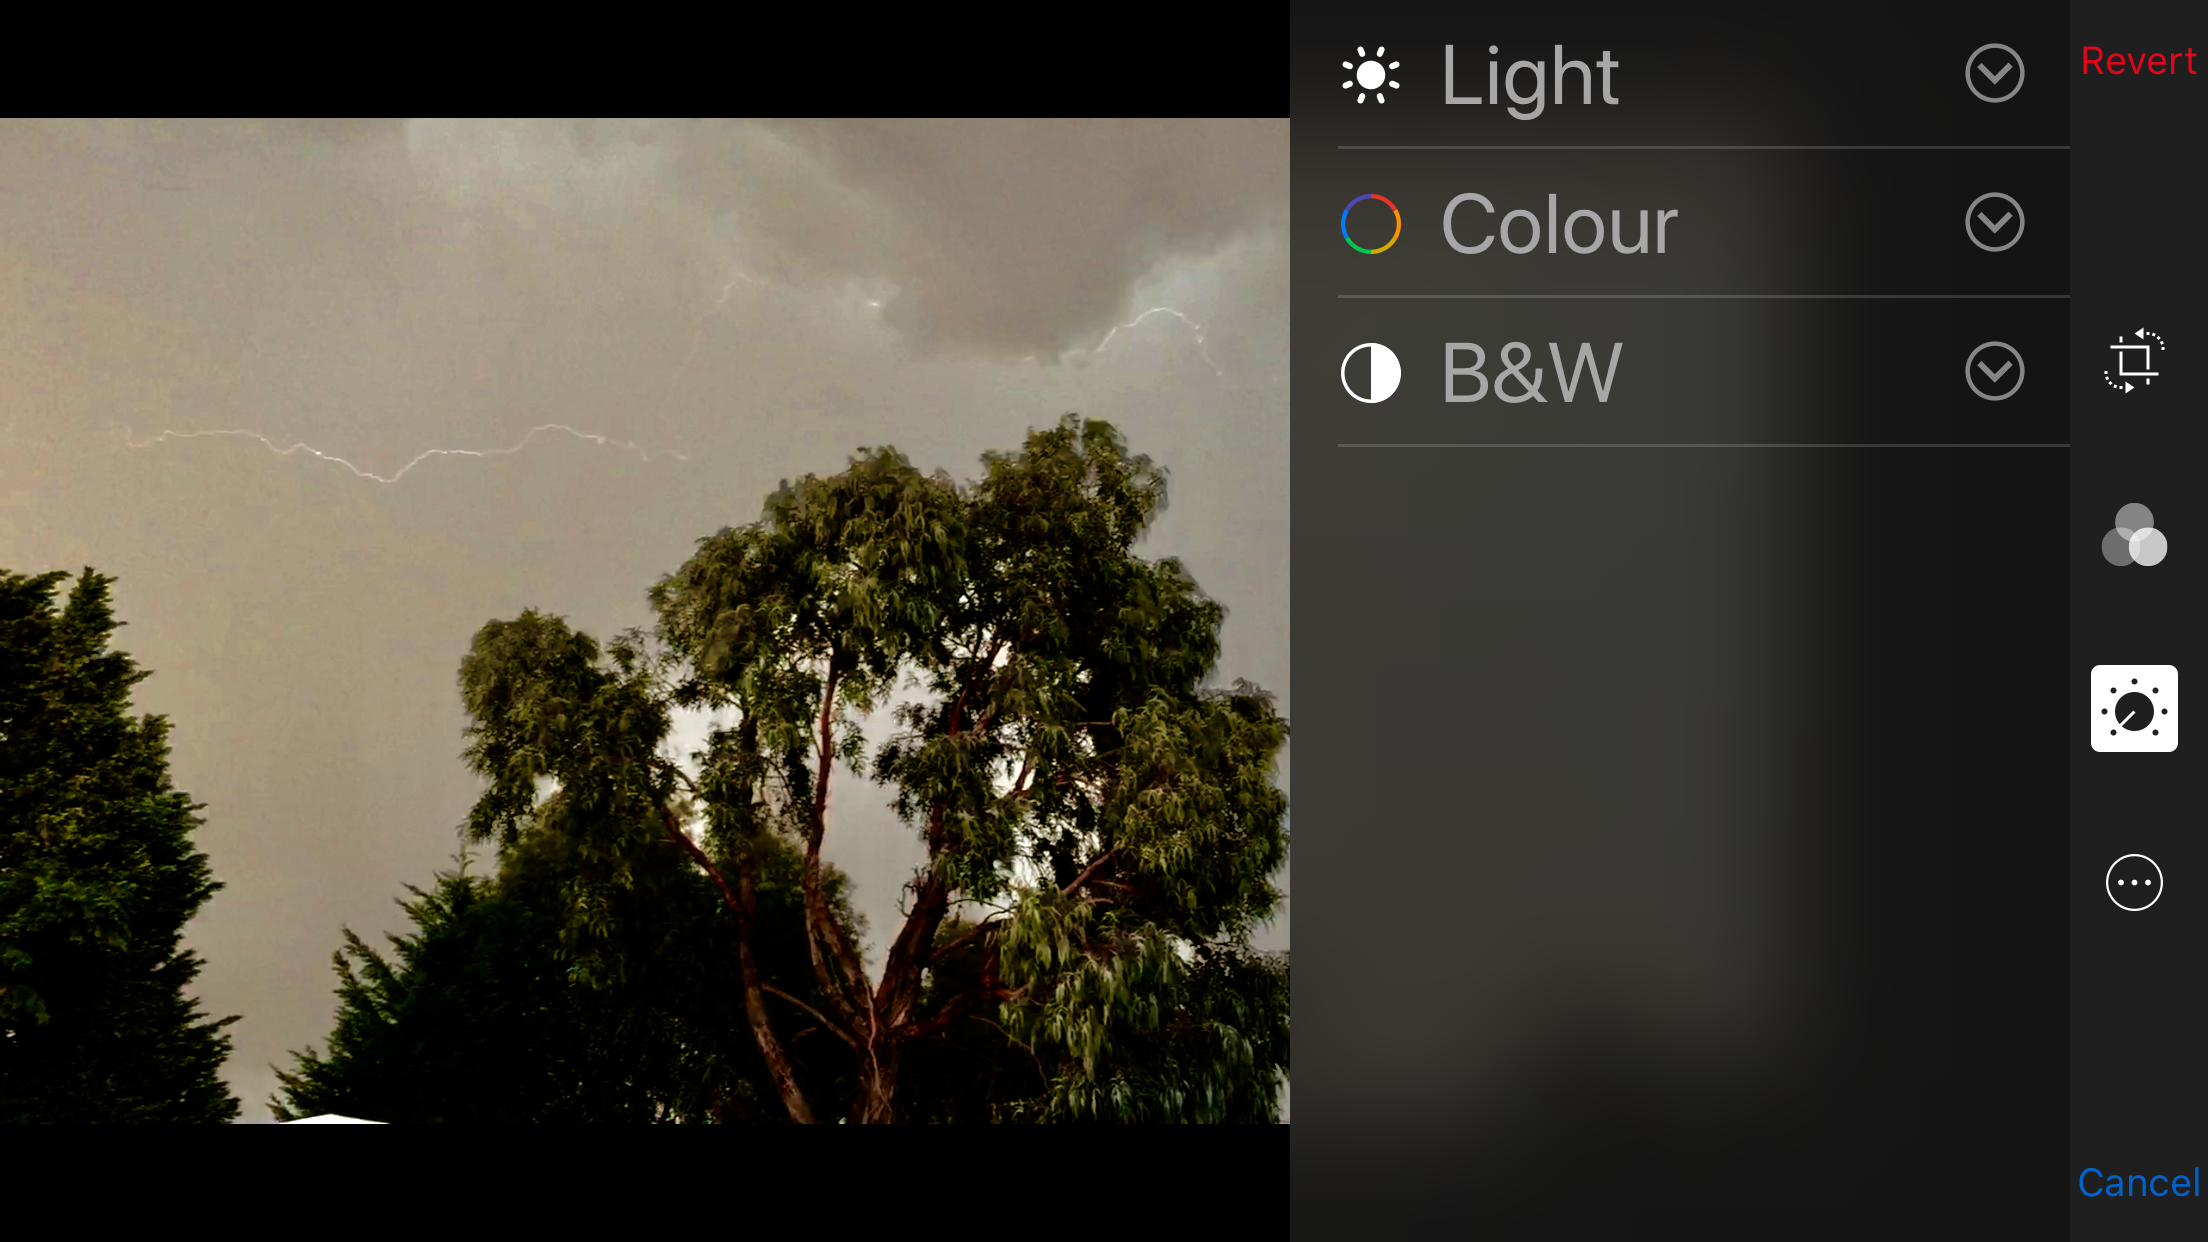
You need to open the captured image in a photo editing software app of some description. It doesn't have to be too sophisticated. With an iOS device, you can go into the EDIT function directly from the picture itself. Now you can play around with the various adjustments but essentially you want to take out most of the light and increase the colour saturation. Altering the contrast and the highlights can also have a positive effect on reducing unwanted 'wash-out' and bringing out the detail of the lightning strike itself. If you're lucky, you will have a frame with just the right amount of detail in the lightning strike itself that, with minimal adjustment, will yield a spectacular result.
To increase your chances, try taking video footage in slo-mo but keep in mind that you will be using far more of your phone's memory this way.
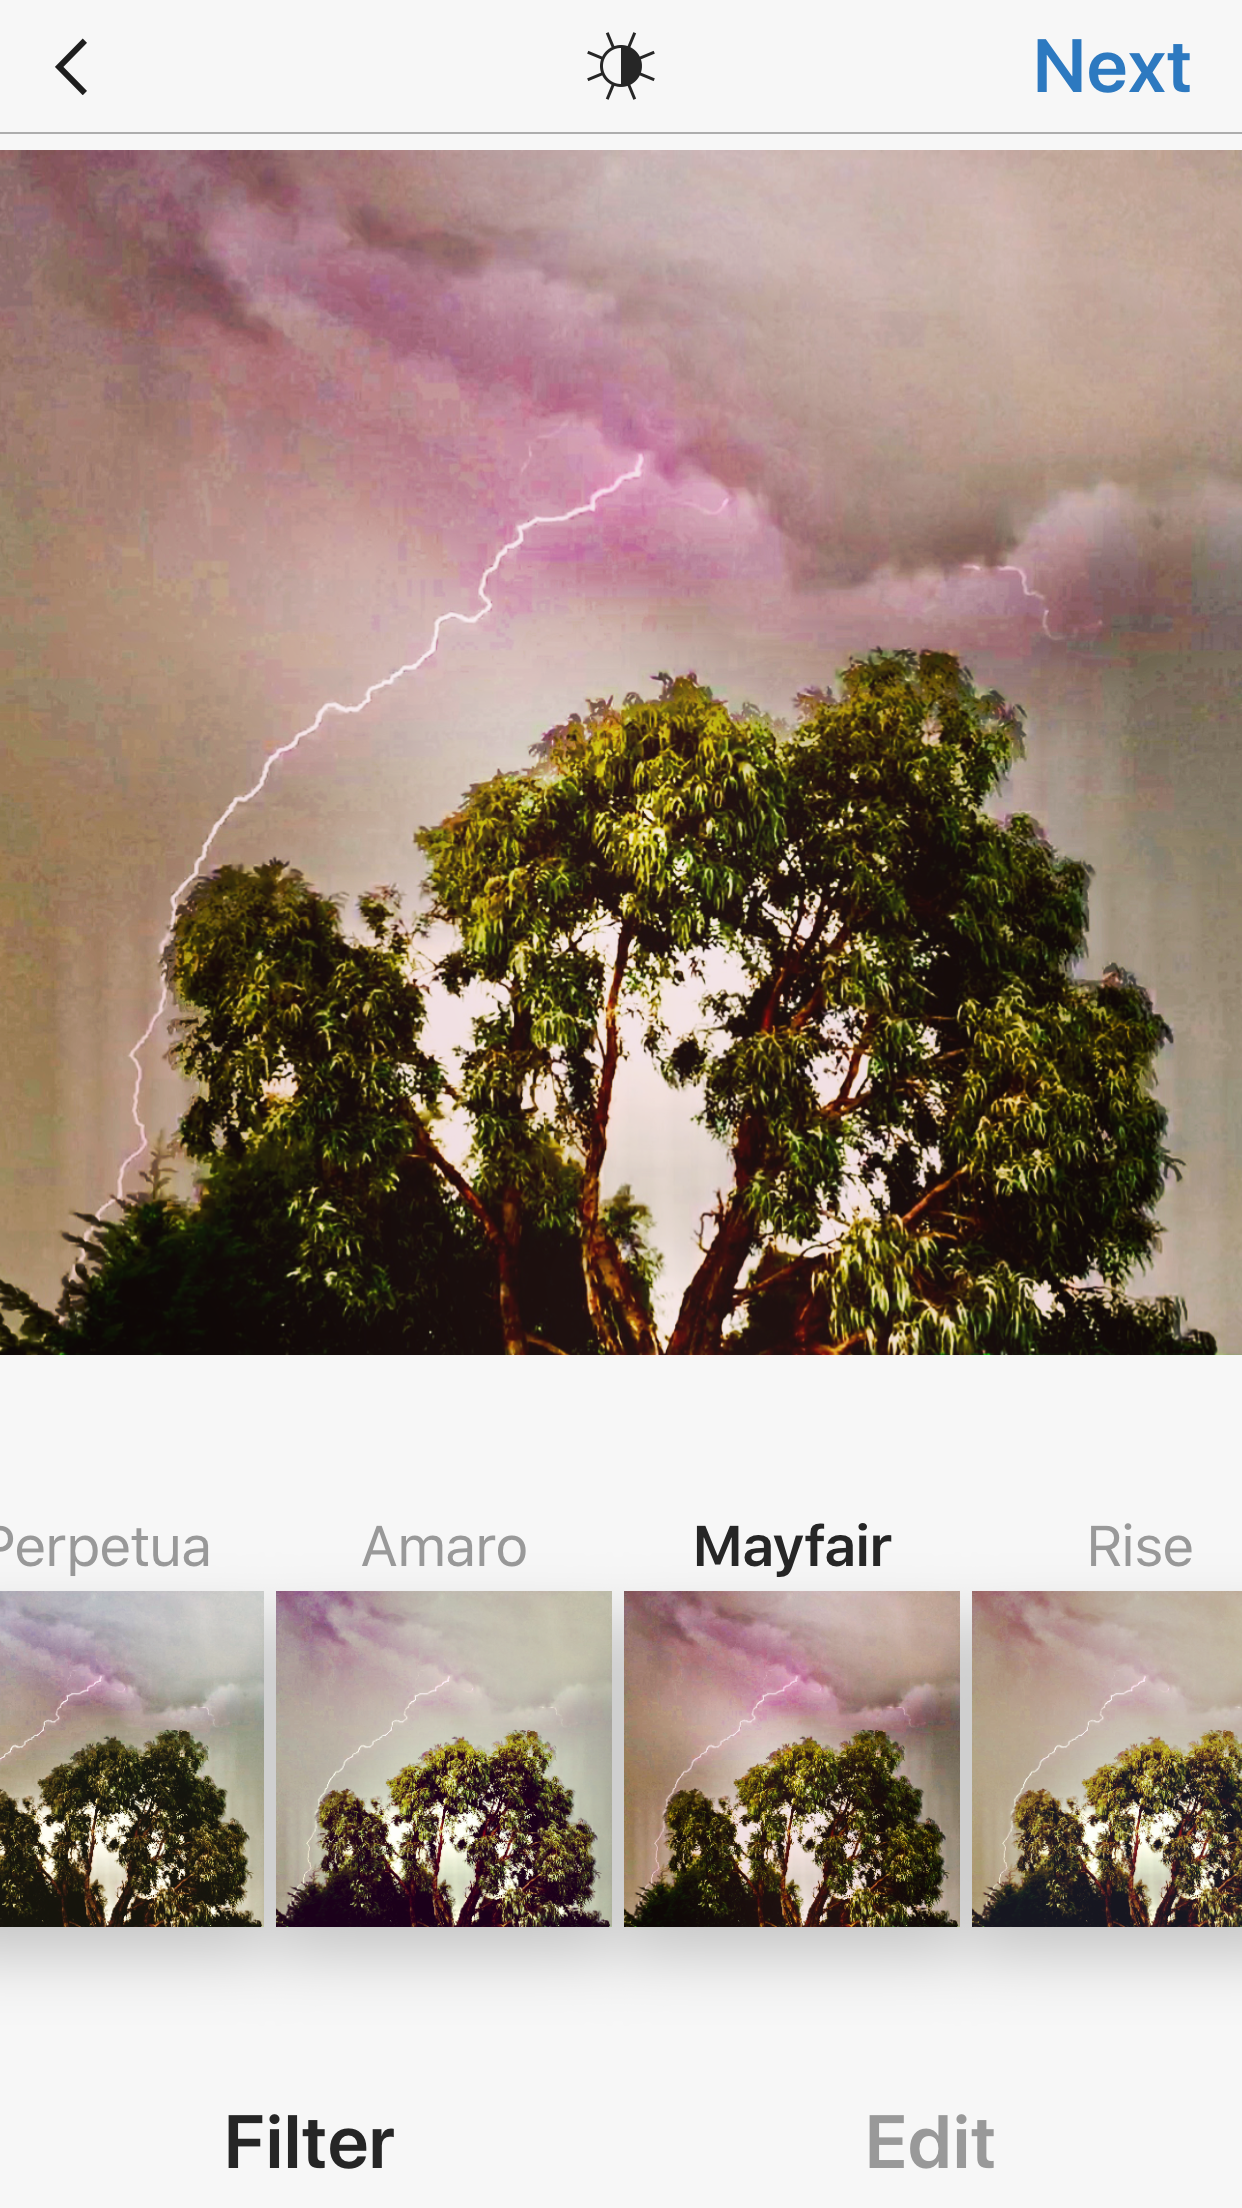
The resultant images from this process will not be of sufficient quality to be enlarged into an A3 size poster but they will be sufficient for posting on social media. In fact, some of the filters on Instagram can add even more drama to your photos.
If you do want to produce images of sufficient quality to print into posters, you will need a digital SLR camera, a tripod and a remote shutter button. Plus you will need to be in the right place at the right time with the necessary equipment and that takes some planning to get right.
This method also requires a degree of luck but given we carry our smart-phones around with us all the time, the chances are much higher that you'll be in favourable conditions with a camera at hand.
This method should work day or night. The images on this page were taken during the day.
Also remember to delete the videos when you're satisfied you've got all the photos you can from that snippet of film.
That's about it. You're now ready to amaze your friends with your photographic abilities but remember, this is a dangerous activity. Be very careful and don't put yourself into harms way unnecessarily.
Why Dual Cab Utes Bend

Essential iPhone apps for RVers

BOS RV Accessories
DIY Provent Catch Can Install
